Assigning users to sites, why and how
Most of the LibreClinica users will start experimenting with LibreClinica on a stand-alone machine,
doing everything as "root". But as soon as things get serious and more users are involved an installation on
a server is required. And different user-access-levels are what you want: you'll create some users as data-entry persons,
some as Monitor, etc.
All this is quite straight forward and we won't get into detail, but one thing is not so obvious: how do you assign
users to sites? And first of all: why should you?
Why assign users to sites?
That's an easy one: because you are required to do so. It is good clinical practice to limit what (trained) users can do to the subjects they are responsible for. And the other way round: to ensure that only authorized people can access and edit the data. Even if you're not very much interested in GCP: it is safer to limit user's access to their "own" subjects. And even if you're not interested in "safer": your sites will like it if they can be sure others can't access or edit "their" data.
How do you assign users to sites?
In these instructions we will set up for study with "Unique Protocol ID" TDS005, two data-entry-persons UserA and UserB for sites A (Amsterdam) and B (Barcelona).
Start with creating the sites. This is done in "Tasks"-"Build Study" menu option. In the
Build-Study-screen this is task number 6 "Create sites". Just click on the plus-sign in the right column and fill
in the details of the sites that will participate. It is not obligatory to fill in everything, but as usual, you must
complete the items with an asterisk. (And it's convenient to give "Facility City:", because this is used as your default
location when creating a new event.)
Use for Site Name "TDS005 Amsterdam" and not just "Amsterdam" and use for the Unique Protocol ID "TDS005_A". Using your
Study OID in the name of your site will help you, when you will look at your user-list later.
And using it in the Protocol ID will make it easier to keep it unique.
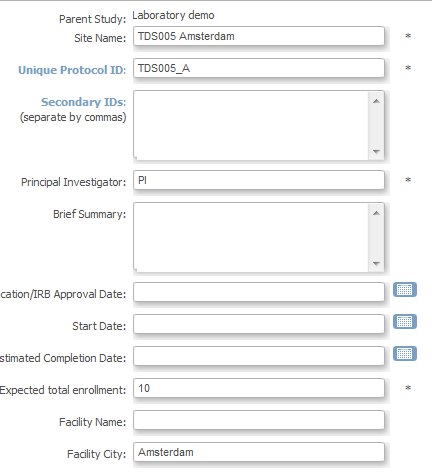
fig. 1: Build Study: Sites, Site details
You may not have realized this, but the above steps can only be done if your "current study" is the study as a whole. "What else can it be?" you may think, but if you click the menu option in the top of your screen, left of the middle, called "Change Study/Site".
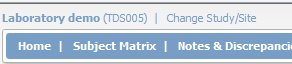
fig. 2: Change Study/Site
Here you'll get a choice of studies and under your current study you will see your two new sites
"TDS005 Amsterdam" and "TDS005 Barcelona". Choose site "TDS005 Amsterdam".
You must now click the button labeled "Confirm study", which sounds odd, as you don't switch
to a study, but to a site. But to a very deep level studies and sites are the same! (We will not discuss the
consequences here, but this means among other things that you can use different versions of a CRF as default for different
sites. Or you can hide CRF's for one site and show it to another. Or you can lock or freeze a site.)
You'll now see "Confirm Changing Study You are choosing to switch to the study: TDS005 Amsterdam with a role of Study Director."
Click the button "Confirm". In the top of your screen you now see the name of your study, plus the name of your site.
If you go to menu option "Tasks"-"Study Setup" the menu option "Build Study" has disappeared.
Next thing to do is create two users: UserA and UserB. You do this in menu-option "Tasks"-"Administration"-"Users" (and not in "Tasks"-"Study Setup"-"Users"). Create the two accounts and choose for "Active Study" not the whole study, but one site. Again: very easy.
If you want to assign existing users to new study-sites, this procedure is slightly different. If you did not already switch to "TDS005 Amsterdam" as described above, do so now. Then you use "Tasks"-"Administration"-"Users". The screen is titled "Manage All Users In TDS005 Amsterdam". Click on "Assign new user to current study" and notice that here again the term "study" is used and not "site". A list of all available users is displayed: scroll through the pages for your user and choose as Role "Clinical Research Coordinator" (if you need a data-entry-person) and check the box in the column "selected". Click button "Submit" and you're ready. To assign UserB to Barcelona, first switch Study/Site to "TDS005 Barcelona" and repeat the other steps.
To see the results, go to menu option "Tasks"-"Administration"-"Users". In the list of users, you will see for UserA "TDS005 Amsterdam", among other studies and sites. If you're consequent in your naming of sites, you will have no difficulty in distinguishing between studies and sites.

fig. 3: List of users
create a site Test&Training
While you're in the process of creating sites, also create a site called Test&Training. This gives you the option to train new Users in 100% the same Study as the production Study. If you're working according to GCP, you should allow only qualified users to your production environment, so design a test for your users and only after they have successfully completed this test in the Site Test&Training they will get access to the "real" sites.
More how-to-pages can be found here.