Before we start
Creating Rules can be fun, but learning how to, can take some time. If you don't have the time to learn by yourself and if you want a training: contact us. And if you want us to do the work: no problem!
How to create a simple rule
For most of your validations you can use the VALIDATION-column in the XL of your CRF. For example you can define a range
for a numeric value, or use a regular expression for a text field according to a certain format.
But there are also multi-variate checks. For example if on a CRF the user has to answer "Abnormal findings? (Yes or No)" plus the question
"If abnormal findings, please specify", then you like a check which raises a discrepancy, when the answer to the first question
is "yes", but no specification is given in the second question.
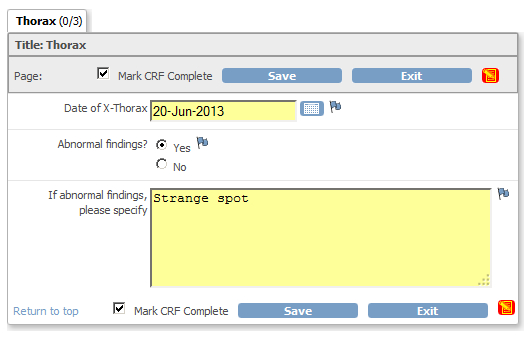
fig. 1: CRF
Making this simple rule is not difficult, but it requires quite a few steps, so hang on to your seat.
Finding the OpenClinica-ID's (OID's) for our rule
What we need for the simple rule are four ingredients:
- the OID of the event
- the OID of the CRF in that event
- the OID of the group in that CRF
- the OID's of the items in that group
Login to OpenClinica as Study Director or Data Manager and click on "Tasks". Choose from the list that appears "Study setup", "Build study".
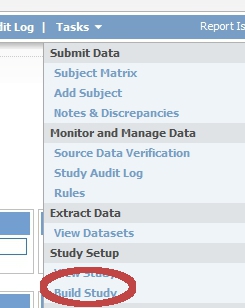
fig. 2: Task menu: Build Study
Click on the magnifier-icon in step 3 "Create Event Definitions". (fig. 3)
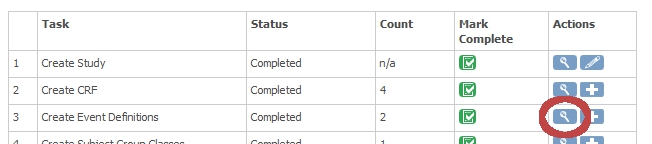
fig. 3: Build Study: Event Definitions
You now see a list of all the events in your study and for this example we'll use EndOfStudy (fig. 3) Click on the magnifier-icon of this event. (fig. 4)

fig. 4: List Event Definitions
Now a screen opens, displaying information about the event and about the CRF's in that event. Here you can find your first ingredient: the OpenClinica ID (OID) of the StudyEvent, in this case SE_EOS (fig. 5). Write this down for later use. Then click on the magnifier-icon on the right of the CRF you want to use for your rule.
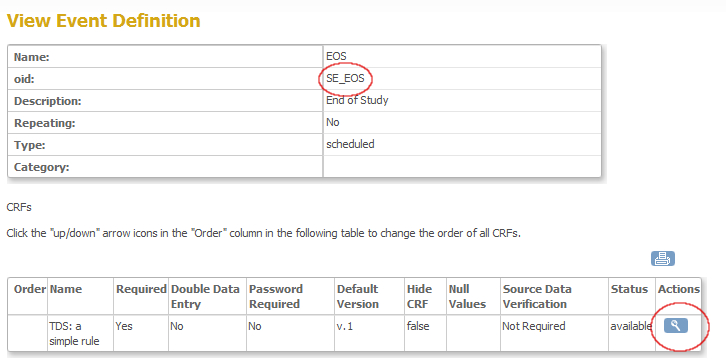
fig. 5: OID of an Event Definition
In the screen that opens you see the CRF-details, including the OID of the CRF: F_TDSASIMPLERU (fig. 6). Again: write this down, because this is your second ingredient. Now click on the strange icon on the right to view the meta-data of the CRF.
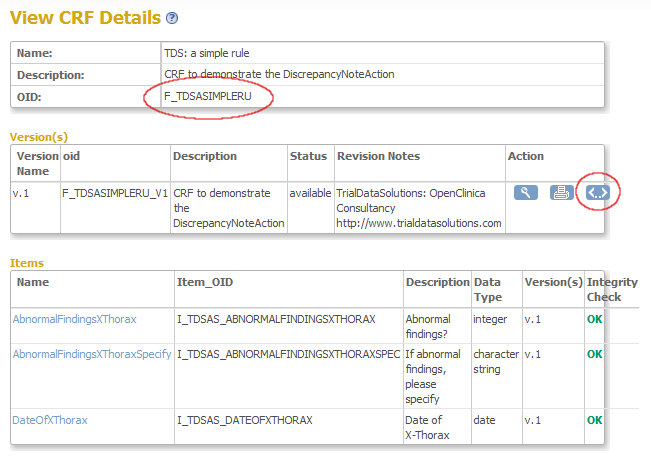
fig. 6: OID of CRF
This next screen gives you both the OID's of the items and of the group these items belong to: ingredients 3 and 4 (fig. 7). The group-OID is IG_DCOG0_UNGROUPED and the OID's for the items are I_DCOG0_ABNORMALFINDINGSXTHORAX and I_DCOG0_ABNORMALFINDINGSXTHORAXSPEC.
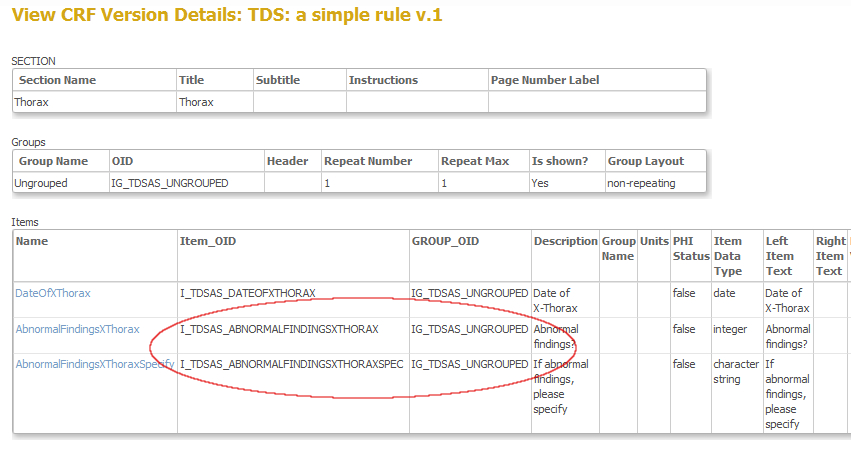
fig. 7: OID's of both item and group
the XML-file explained
Your next step is starting your XML-editor. (In my case this is Notepad++, but any plain text-editor will do.) Have a look at fig. 8 and read the explanation below. (And yes, you can download the CRF plus the XML-file.)
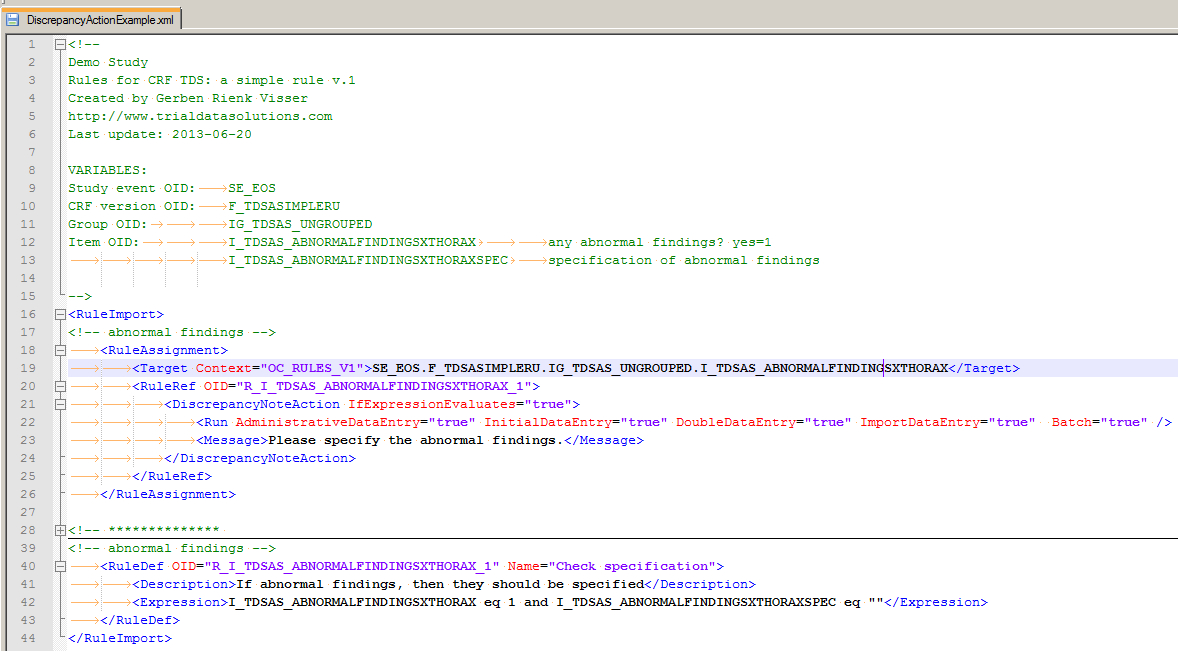
fig. 8: the XML file
First of all the bit between <!-- and --!>: this is all comment and the general advice is: put as much information in here as you can! Who made this rule and when and most important of all: what are the 4 (or more) ingredients (VARIABLES in the screenshot) for this rule?
Then the XML-part of the rule. This is enclosed by the RuleImport-tag. It consists of two elements: RuleAssignment or: on what does it work? and RuleDef or: how does it work?
Then we look inside the RuleAssignment (line 18) and we see the Target-tag with the attribute
Context="OC_RULES_V1" which is obligatory.
The content of this tag is what it's all about:
Event-OID.CRF-OID.Group-OID.Item-OID
On the next line we see the OID of this rule defined. This is also used in the second main tag RuleDef, where we
define what we want to check. The check itself is I_TDSAS_ABNORMALFINDINGSXTHORAX eq 1 and I_TDSAS_ABNORMALFINDINGSXTHORAXSPEC eq ""
meaning:
- the answer to the question "Abnormal findings?" is "yes" or 1
and
- the field for "please specify" is empty or ""
If this is the case, or to put it in another way IfExpressionEvaluates="true", then we want a message to be displayed Please specify the abnormal findings. and a discrepancy raised.
Uploading the simple rule
Now that we have our rule, let's go back to the Build Study screen (Tasks-Study Setup-Build Study). In this screen click on the plus-icon of step 5 "Create rules". A screen opens in which you can browse to your XML-file (fig. 9).
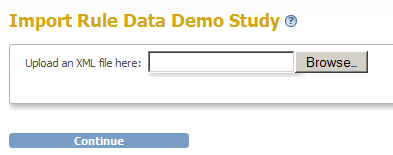
fig. 9: upload the XML file
The last step to take is validating the XML-file, so click on the Continue-button and a screen like fig. 10 will open. Click again on Continue and your rule has been assigned to your study!
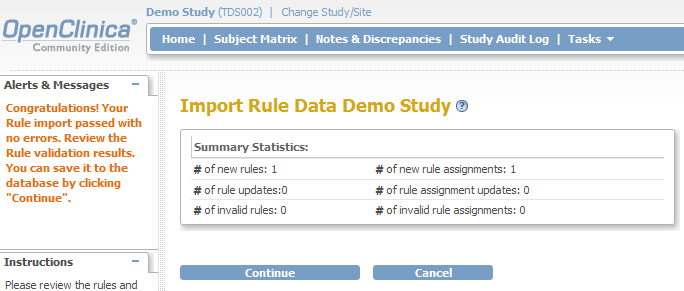
fig. 10: upload the XML file
Other how-to-pages can be found here.