Changing the layout of a CRF
Although OpenClinica is very flexible in what you can do with it, it is not so flexible in how you can display it.
In fact there is not so much you can do with the layout: everything is determined by the stylesheets.
Of course there's nothing wrong with changing the stylesheet. For example, if you want to have a bit more space
for the "LEFT_ITEM_TEXT" and have it aligned to the left, you can edit the stylesheet styles.css.
But some of us have to run their studies in an environment with lots of other studies and then changing a stylesheet is not
an option.
jQuery
R. Meester came up with a very clever way to change the style-sheet-classes by using jQuery. How it works is described at the wiki-book and you can down-load an example CRF here.
a bit simpler than that
One other way of coping with this limitation is by using so-called inline style, with which you can override the
normal stylesheet. For example, you want to modify the column of the Left_Item_Text.
First you must find out which class in the stylesheet is applied. You do this, in FireFox, by opening a CRF and right-clicking on a Left_Item_Text.
Choose Inspect Element
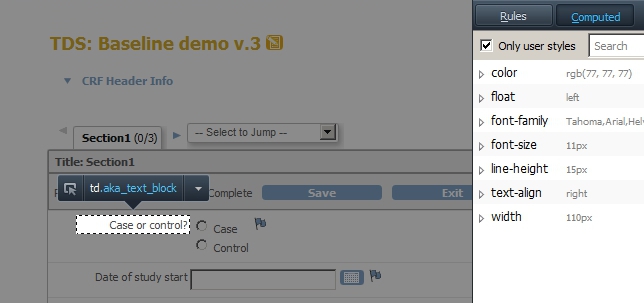
fig. 1: inspect element
Now we see that the class is called .aka_text_block (the "aka" is from "Akaza", not "also known as") and the width is now 110px.
We would like to change that to 200 and align the text to the left.
To do this we put
<style type="text/css">.aka_text_block{width:200px;text-align:left;}</style>
in the Instructions
of the section.

fig. 2: inline style
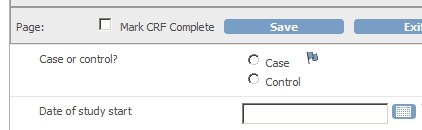
fig. 3: the result
Another example
The same method can be used in a repeating_item_group. Take for example this CRF:
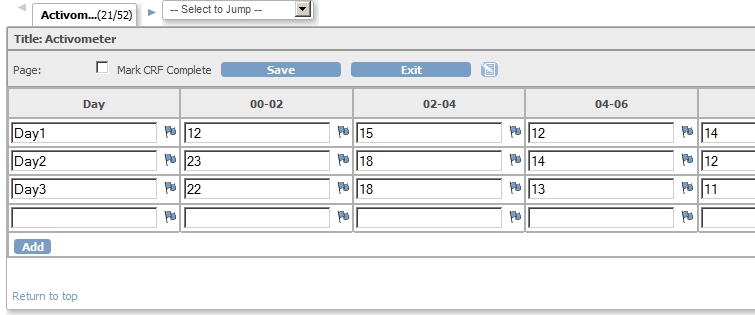
fig. 4: very wide CRF
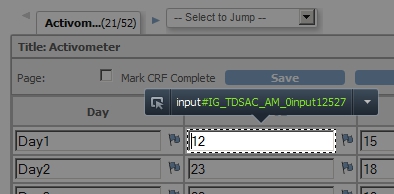
fig. 5: no special class associated with this element
In this CRF for every two hours the result of a test must be entered. This results in 1 + 12 columns, which all have the standard width. All the inputs are just that: input, so we do not change a class but set the properties of all the elements of type input.
We now put <style type="text/css">input{width:40px;}</style> in the instructions of the section.

fig. 6: changing the width of all inputs
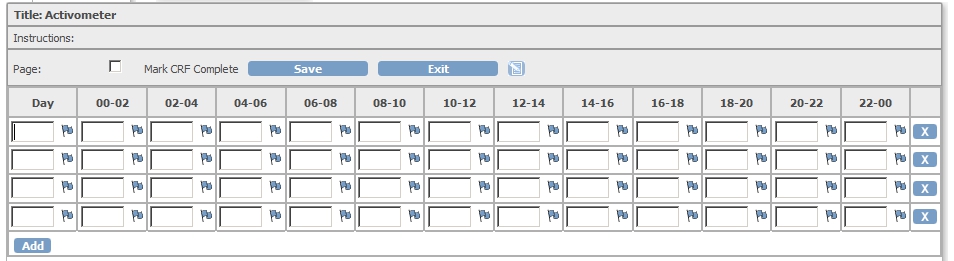
fig. 7: smaller columns as result
As you can see in the screen-shot, the columns all fit on the screen.
any extra small solutions?
For those of you who just want to make one input a bit smaller and do not feel like the whole jquery functions-and-classes-approach, here's another trick. The idea is that you use some jquery, but not more than necessary.
<div id="B"></div>
<script src="includes/jmesa/jquery.min.js">// for OC versions before 3.1.4, use jquery-1.3.2.min.js !</script>
<script lang="Javascript">$.noConflict();
jQuery(document).ready(function($){var T = $("#B").parent().parent().find("input");
 $(T).width(10);});</script>
fig. 8: smaller column
The script defines first an element called B for beacon. From there it goes to the parent of the parent and from there finds the first input, the target, or T. Of this object it sets the widht to 10.
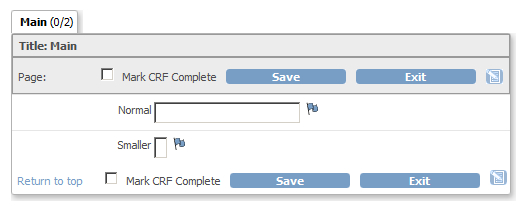
fig. 9: the result
and making items read-only?
Setting an item read-only is almost the same as changing the layout of an item. The idea is that you use some jquery, but not more than necessary. Again: paste the script in the right_item_text field.
<div id="RO"></div>
<script src="includes/jmesa/jquery.min.js"></script>
<script lang="Javascript">$.noConflict();
jQuery(document).ready(function($){var T = $("#RO").parent().parent().find("input");
 $(T).prop({"readonly":"readonly"});});</script>
cool, but actually I need that for a repeating item group
Now this last trick does not work when you are looking at a table, or repeating item group, because whatever is in the right item text will not be shown. But then again: if you define an element in the header of one of the items in the repeating item group, you also have a reference point from which you can refer to a column. So paste the script into the header column of one of the items of your repeating_item_group:
<span class="tableref"></span>
<script src="includes/jmesa/jquery.min.js"></script>
<script>
$.noConflict();
jQuery(document).ready(function($){
  function setPropGroupColumnN(pClassSelector, pN, pElementType, pPropMap) {
    $(pClassSelector).parent().parent().parent().parent().children('tbody').children('tr').children('td:nth-child(' + pN + ')').children(pElementType).prop(pPropMap);
  }
  setPropGroupColumnN('.tableref','1','input',{'readonly':'readonly'});
});
</script>
and what about endless radio-options?
Under some circumstances you can have radio-options with very long texts and they are all on one line. This is because the <td> has been given the attribute nowrap. You can remove this attribute with the following bit of script, that you put in the right_item_text of your CRF-item:
<div id="B"></div>
<script src="includes/jmesa/jquery.min.js"></script>
<script lang="Javascript">$.noConflict();
jQuery(document).ready(function($){
  var T = $("#B").parent().parent().children("td:nth-child(3)");
  $(T).removeAttr("nowrap");
  $(T).width("150px");
});
</script>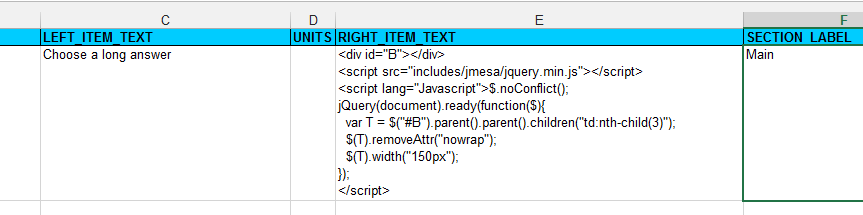
fig. 10
And the result will be like this:
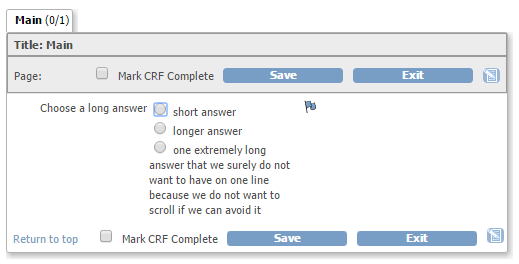
fig. 11
Other how-to-pages can be found here.
this page was last reviewed December 2015