different CRF-versions for different sites
Most of the time when working with OpenClinica we use CRF-versions when we change something about a CRF. And throughout the Study we generally use the same CRF-version. But it can be handy in some situations to have different versions of a CRF for different Sites. For example when two Sites in a Study use completely different Study-numbers: Site A uses one letter and three digits, like Z546 and Site B uses one letter and five digits: B34572. We will use a regular expression to check the input.
If you're not sure you know how to setup Sites, have a look at Assigning users to sites, why and how.
start with the CRF
First we design the CRF for Site A. We start with the CRF-tab of the XL sheet:

fig. 1: version information, including the site
In the Items-tab we put one item for date informed consent and one for Study-number:

fig. 2: Items-section, with regular expression for Site A
The regular expression can be tested on for example http://regexpal.com and means: take one letter from A to Z and then three digits.
We upload the CRF as a new one.
and now Site B
For Site B we first of all change the Version and the Version-description in the XL.

fig. 3: version information for site B
And then we change the regular expression plus the Validation_Error_Message.

fig. 4: regular expression for Site B
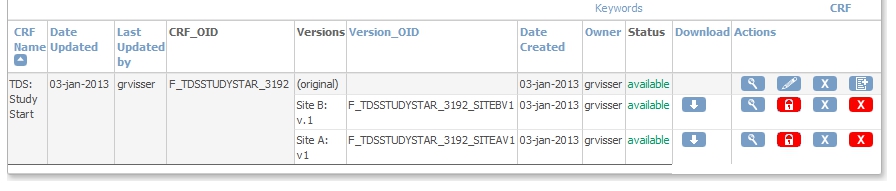
We now upload the CRF as a new version of the first one:
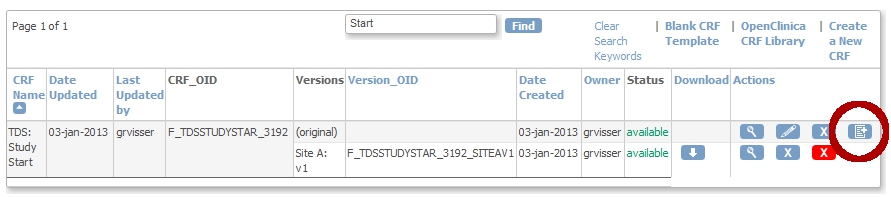
fig. 5: upload as a new version
adding the CRF to an Event
We're almost there! First we add the CRF to the Event Screening and assign the CRF to this new Event:
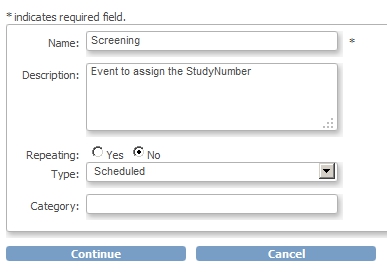
fig. 6: creating Event Screening
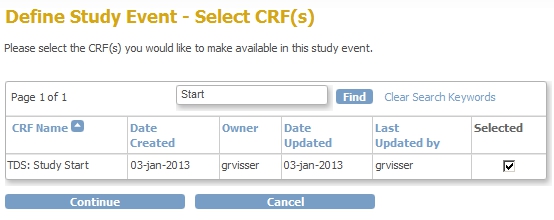
fig. 7: adding the CRF to the new Event
Click Continue twice and then Confirm and Finish. You are now back in the Build-Study-screen. Click on the magnifier-icon of Task 6: Sites.
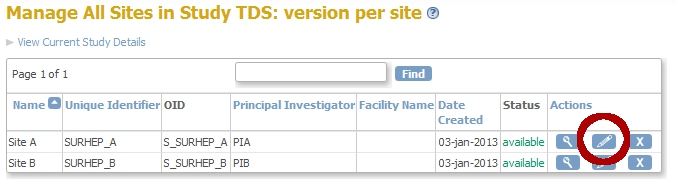
fig. 8: Sites A and B
version Site A for Site A
When you click the pencil-icon of Site A, you will come to the screen Update Site Details: Site A. Scroll down to the part with the Visits, called Update Site Event Definitions. Open the node of Visit Screening and set the Default Version to Site A: v.1 and set the Available Versions also to Site A: v.1. Click Submit Site
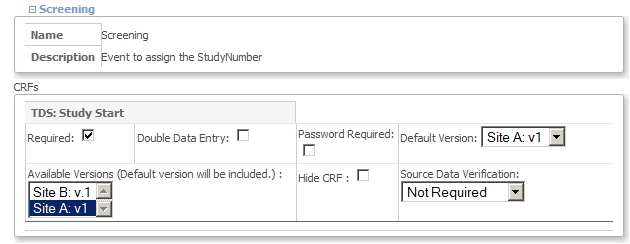
fig. 9: Site A settings
Do the same for Site B, but then with the other version, of course.
the result
If you now change to Site B and try to enter a Study-number with the format of Site A, you will see something like this:
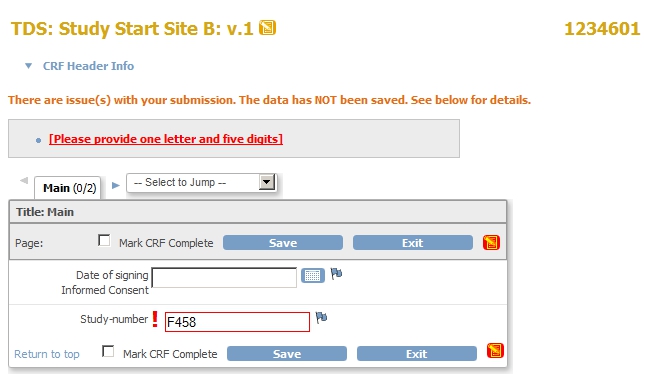
fig. 10: Site A format in Site B